Overview
During the 2020 pandemic lockdown, I helped my Mom start a weekly paper-crafting live stream show that kind of took off. I’ve used it as a platform to push myself and learn the technical side of live streaming. The project, Craft Roulette, continues to grow, so I continue to work on it.
I recently figured out a way to almost automate the creation of YouTube chapters for the archived live streams. This post contains instructions on how to duplicate my setup and the tool I use to convert the Elgato Streamdeck Timestamps plugin output to the YouTube chapter format.
I created this tool for my own workflow and I’m actively using it in production. I decided to write this blog post and share the tool so other creators can benefit from it too!
The Converter
Drag & Drop your timestamps log file or click to select from system
Only .txt files containing timestamps will be processed
If you’re curious how this works, click here to view the source code.
Setup Guide & How To Use
This workflow isn’t perfect and a bit of a hack, but it works for me. I hope it helps you too!

Step 1: Set Up the Timestamp Plugin
The Elgato Timestamp plugin lets you mark memorable events with a simple key press, perfect for creating YouTube chapters:

- Install the official Timestamp plugin from the Stream Deck Marketplace
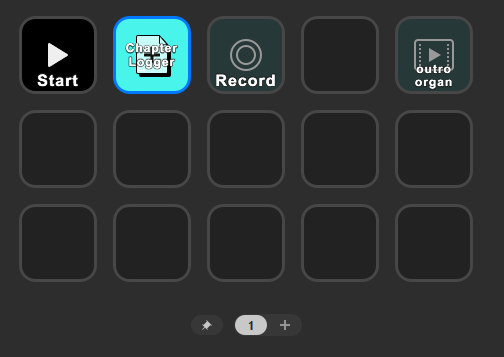
- Add the “New Log” action to start tracking timestamps
- Add the “Marker” action to mark key moments during your stream
- Make sure “Elapsed time” is checked in the Marker settings
Step 2: Create Multi-Actions for Show or Stream Segments

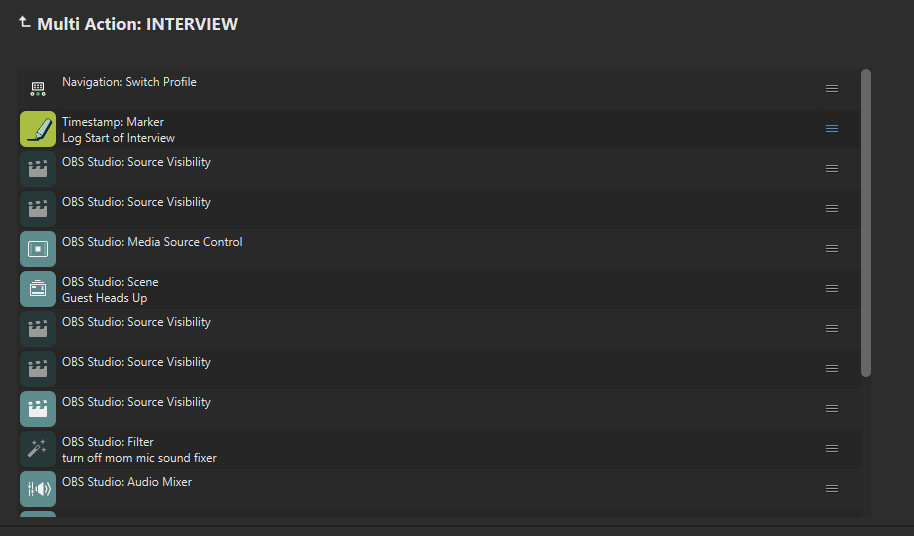
For streamlined workflow, create Multi-Actions that both change your scene and mark timestamps:
- Create a new Multi-Action button on your Stream Deck
- Add your scene switching action (e.g., “OBS Studio: Scene”)
- Add the “Timestamp: Marker” action to the same Multi-Action
- Set a descriptive title for the marker (e.g., “Guest Introduction”, “Q&A Session”)
- Repeat for each segment of your show
This allows you to simultaneously switch scenes and mark timestamps with a single button press.
Step 3: During Your Stream
While streaming, use your Stream Deck to mark important segments:

- Don’t forget to press the “New Log” button at the beginning of your stream, or your timestamps won’t get logged!
- As your show progresses, press your Multi-Action buttons to switch scenes and mark timestamps
- Each press creates a timestamp with your pre-defined label
- Continue marking all important segments throughout your stream
The beauty of this system is its minimal impact on your production workflow. I’ve only added two extra button presses to my entire show production: starting the log session at the beginning and ending it when we wrap up. All other logging actions are seamlessly integrated into Multi-Actions I already had set up to manage scene transitions and show states.
Step 4: Check Your Timestamps
After your stream is complete:
Press the “New Log” button again to end the logging session (important)
Your timestamp log will be saved as a .txt file in the directory you set up
The log file will contain lines like:
elapsed time: 00:02:39 text: Last Week's Episode
Step 5: Convert to YouTube Chapters
Use the converter above to transform your timestamps to YouTube-compatible chapter markers:
- Drag and drop your timestamp file into the converter
- The first chapter will be set to 00:00 (YouTube requirement)
- If there is no timestamp in the first 10 seconds of your log, a generic “Intro” chapter will be created
- Adjust the offset if needed (see below)
- Copy the formatted chapters
- Paste into your YouTube video description
Why You Might Need the Offset Feature
The offset feature is essential for streamers because:
- Stream Start Timing: The exact moment you go live often doesn’t match when you start your timestamp log or mark your intro
- Editing Adjustments: If you line up the first chapter, all the others should fall into place
How to Use the Offset:
- Positive Offset: Moves all timestamps later (e.g., +5 seconds if you added a 5-second intro)
- Negative Offset: Moves all timestamps earlier (e.g., -10 seconds if you trimmed the first 10 seconds)
- The first chapter will always remain at 00:00 as required by YouTube
Behind the Scenes
I built the converter using regular expressions to extract timestamps and titles:
// Format: "elapsed time: 00:00:02    text: Last Week's Contributions"
const elgatoRegex = /elapsed time: (\d{2}):(\d{2}):(\d{2})\s+text: (.+)/g;
I fully endorse the use of AI to generate regular expressions.
The tool parses matches into a data structure, applies the offset, and formats everything according to YouTube’s requirements. I implemented special handling to ensure the first chapter is at 00:00, and add timestamp adjustments through a simple offset system.
Why I Built This Tool
No matter how hard I tried, I would always give up on using chapters on YouTube if I had to manually assign them. Even though I could do it in 5-10 minutes, it was always really low down on my list of priorities. With this tool, it takes me about a minute to convert and add the chapters after the stream ends, which means that I will actually do it.
If you’re like me and tend to skip adding chapters because it feels like one more tedious post-production task, this might help you too. Feel free to reach out with any comments or suggestions!
Comments